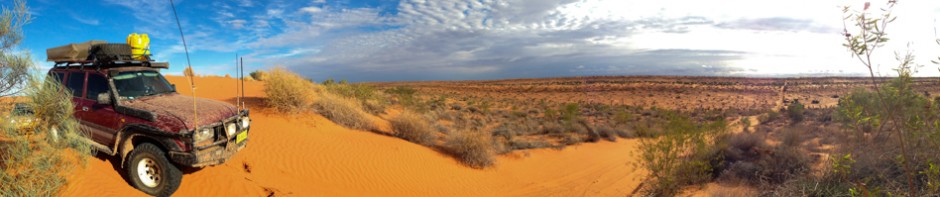
Penelope is a Land Cruiser 80 series diesel (HZJ80), manufactured in December 1990 so its an early example . Landrover fans, before you stop reading, my previous 4×4 was a 1989 Landrover 90 with a 300tdi, which took me and a few few friends to Morocco and back from the UK.
We purchased Penelope in late 2010 with 320,000KMs on the clock. It has taken us on many Australian trips, as well as doing the daily commute from Manly to North Sydney. As such most of the modifications were added over a three year period with lots of opportunity to test them out. The odometer read 401, 900 the day we left.
Wheels and Suspension
The car has a 2″ lift and Pedders springs, with the heavy duty ones at the back.
Wheels are 15″ steel with 33″ Mickey Thompson MTZs, mud-terrain tyres. These are not what i would have purchased if i was starting from scratch. At 12.5 inches wide, they certainly make noise and put load on steering. However, they got us through the mud and bogs of the Simpson and we were glad to have them.
The shocks were replaced just before departure and are now OME all round. Initially I had packed 2 of the old ones as spares, but the size, weight and likely hood of needing them put me off. I just kept a few of the nuts and bushings for the tool box.
Electrical modifications
2nd battery with a simple isolator .
Voltage display in the car so we can check the both batteries are charging/ alternator is working etc.
Dedicated wiring from the aux battery to the rear for the fridge & rear socket.
LED light strip on the rear tailgate, which lights up the boot / fridge area.
LED light strip in the tent, powered from the Anderson socket on the rear bar. This has to be connected every night.
Under the bonnet there is a worn out compressor i still need to remove. Tyres are pumped up with a Tigerz 11 compressor. I have made an adapter hose so i can run an ARB hose and tyre gauge.
Since leaving i have added a pair of 12v sockets from the aux battery, so we can charge things in the evening.
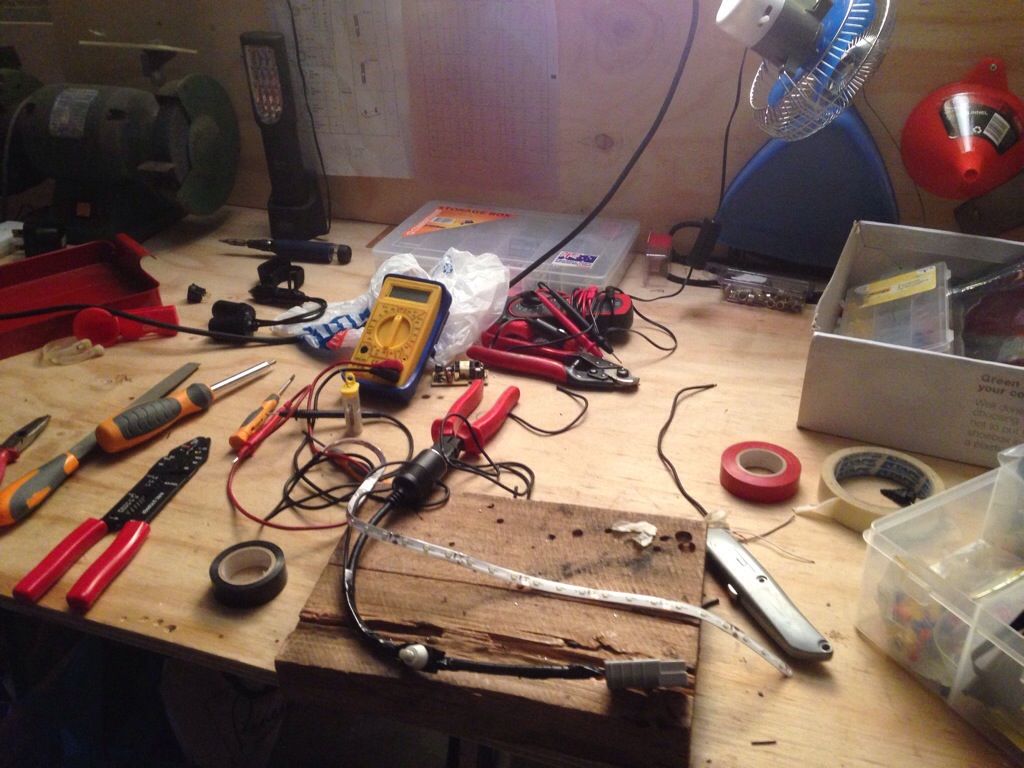 Yet another late night in the garage soldering.
Rear storage
We knew that storage was something that had to be sorted for a longer trip. Taking all the bags out to get to the back was fine for a short trip, but we needed to be more organised for something longer. Australia has a lot of great roller drawer manufactures and car storage suppliers. Well engineered, these are built to last, but were out of our budget (besides, we couldn’t have drawers worth more than the car!). A previous owner had done a reasonable job of building a rear shelf with drawers underneath, we already owned a fridge so we spent a considerable amount of time planning the layout.

The plan in 3D!

Marine plywood is normally the choice, I decided that regular ply would last the 9 months we would need it for. Critical to the design was something that wouldn’t rattle itself apart on corrugations. Each shelf is connected the cargo barrier that sits where the rear seats were.
 Ruth drilling in a tricky spot.
The finished article, ready for our shakedown trip to Tasmania. 
Rear seats
Many travellers advise that you should keep a seat free so you can offer locals a lift. I have certainly done this in the past on previous trips. However this time we needed (wanted) the space. Each of the rear seats in the 80 series weighed 18Kg, so removing them saved space and bought us a valuable 36Kg of GVM.
We use this area for water storage primarily, with a shelf over the top for lighter things. 
Roof rack
We had always had mounted the roof tent to a pair of roof bars, which worked very well. However for this trip we wanted to carry a second spare wheel on the roof. As such we opted for a full length roof rack. All steel and with bars at the front, but not the back to allow for the roof tent. We only made one modification, which was to remove the two of the spot light mounts which created a little bit more room for the spare tyre.
 Any excuse for a new power tool!
Others
Under the bonnet there is a heat exchanging shower pump. This was installed by a previous owner and came with a domestic shower head and some hose. I made a short section of hose to adapt this from the shower fitting to the regular 12mm garden hose fitting so it can be use with a hose pipe (which we need to carry anyway to fill water tanks). The shower head is actually a hanging basket waterer, but works really well and at a much slower flow rate that a normal shower head. We typically use 4l per person per (hot:) ) shower.
We replaced the front seats with a pair of secondhand Recaro Experts, as I was getting a bad back. It was a pretty simple process that just involved getting a set of rails from a supplier in Melbourne and bolting them in. No bad backs since.
Windows have been tinted to reduce the amount of heat in the car and keep passers by from seeing all our gear.
You must be logged in to post a comment.